
Blocking Time on the Calendar
Overview
Blocked time reserves a slot on the calendar for anything that isn't a client appointment — a lunch break, a staff meeting, training, equipment maintenance — so nobody accidentally books over it. There's no separate screen for it; it all happens right on the calendar.
Creating a blocked time
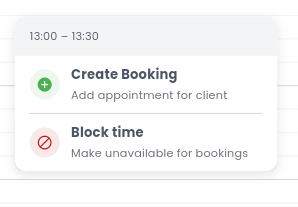
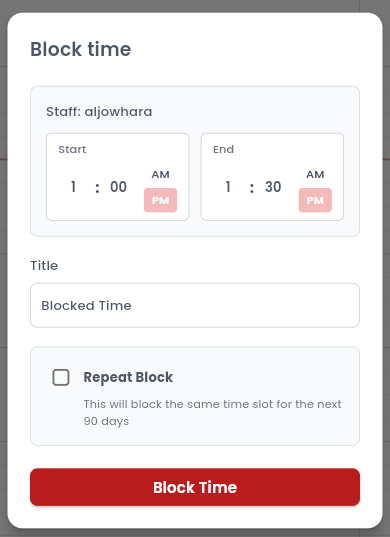
Tap an empty slot in a staff member's (or resource's) column and choose Block Time, or drag directly on the calendar grid to draw the block. In the dialog that opens:
- Set a start and end time (the end must be after the start).
- Give it a Title — for example "Lunch Break," "Meeting," or "Training." Leave it blank and it defaults to "Blocked Time."
- Tick Repeat Block to automatically create the same block every day for the next 90 days.
- Tap Block Time to save.
Editing and deleting
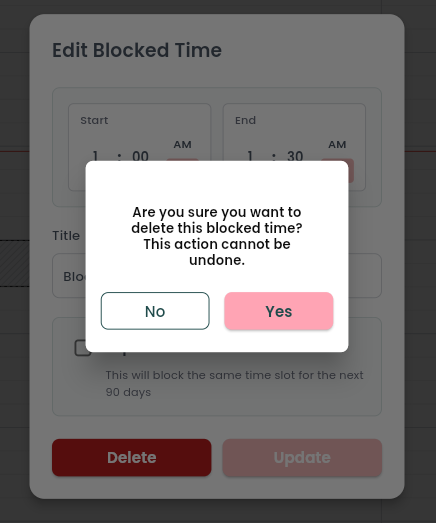
Tap a block on the calendar to open Edit Blocked Time, make your changes, and tap Update, or tap Delete and confirm (this can't be undone). You can also drag a block to a new time or resize it, just like an appointment.
Notes & limitations
Blocked time keeps that staff member or resource unavailable for the whole period — if someone tries to book over it, the calendar flags a "Conflicts with blocked time" warning, helping avoid accidental double-bookings. Adding, editing, and deleting blocks are each controlled by permission, so depending on your role you may only be able to view them.